One thing I enjoy about my friend R is that she is always trying to new things – and frequently invites me to share in her adventures. This past Saturday, she asked me to come out to her farm so we could try cyanotype and shibori. I’m always up for getting my hands dirty!
 We started with cyanotype. There’s a way to do it with chemicals you mix yourself, but for this first time, she purchased a package of pre-treated fabric. Like camera film, all you have to do is expose it to UV light for about 15 minutes to get the “picture” to take. So, we drew the blinds of her studio against the sun, cut some sections of fabric, and began laying out our compositions. The fabric exposed to the sun will turn blue; the area covered by an object will turn white.
 We added a little tape to the corners, so the fabric wouldn’t shift on the board. We started with buttons, foam cut-outs, and dried leaves. Then we covered our compositions with a piece of glass (can’t be UV treated glass – just the old-fashioned kind! We used glass taken out of picture frames) simply to hold all the objects in place, since it was a little breezy outside. I don’t know if you can see in the photo, but in the lower right, I used some netting from a bag of lemons to see if it would make an interesting pattern – and I weighted the extra down with stones.
After success with our first go, we got more inventive. Here’s a photo showing how the second batch turned out.

This project was super easy, and not messy at all. It does require a good, sunny day, though.
After a break for lunch, we launched into some shibori dyeing. R had purchased indigo dye, and got it mixed up ahead of time in a vat. Smelly stuff! We prepared our fabrics by finding different ways to scrunch, knot, twist and tie them. Later at home, the Mouse said dismissively, “Oh, it’s just tie-dye!” She’s not wrong – the tie-dye t-shirt kits you get at Walmart can be used to accomplish the same effects. R and I were just using the authentic indigo dye to get the traditional rich blue colour.
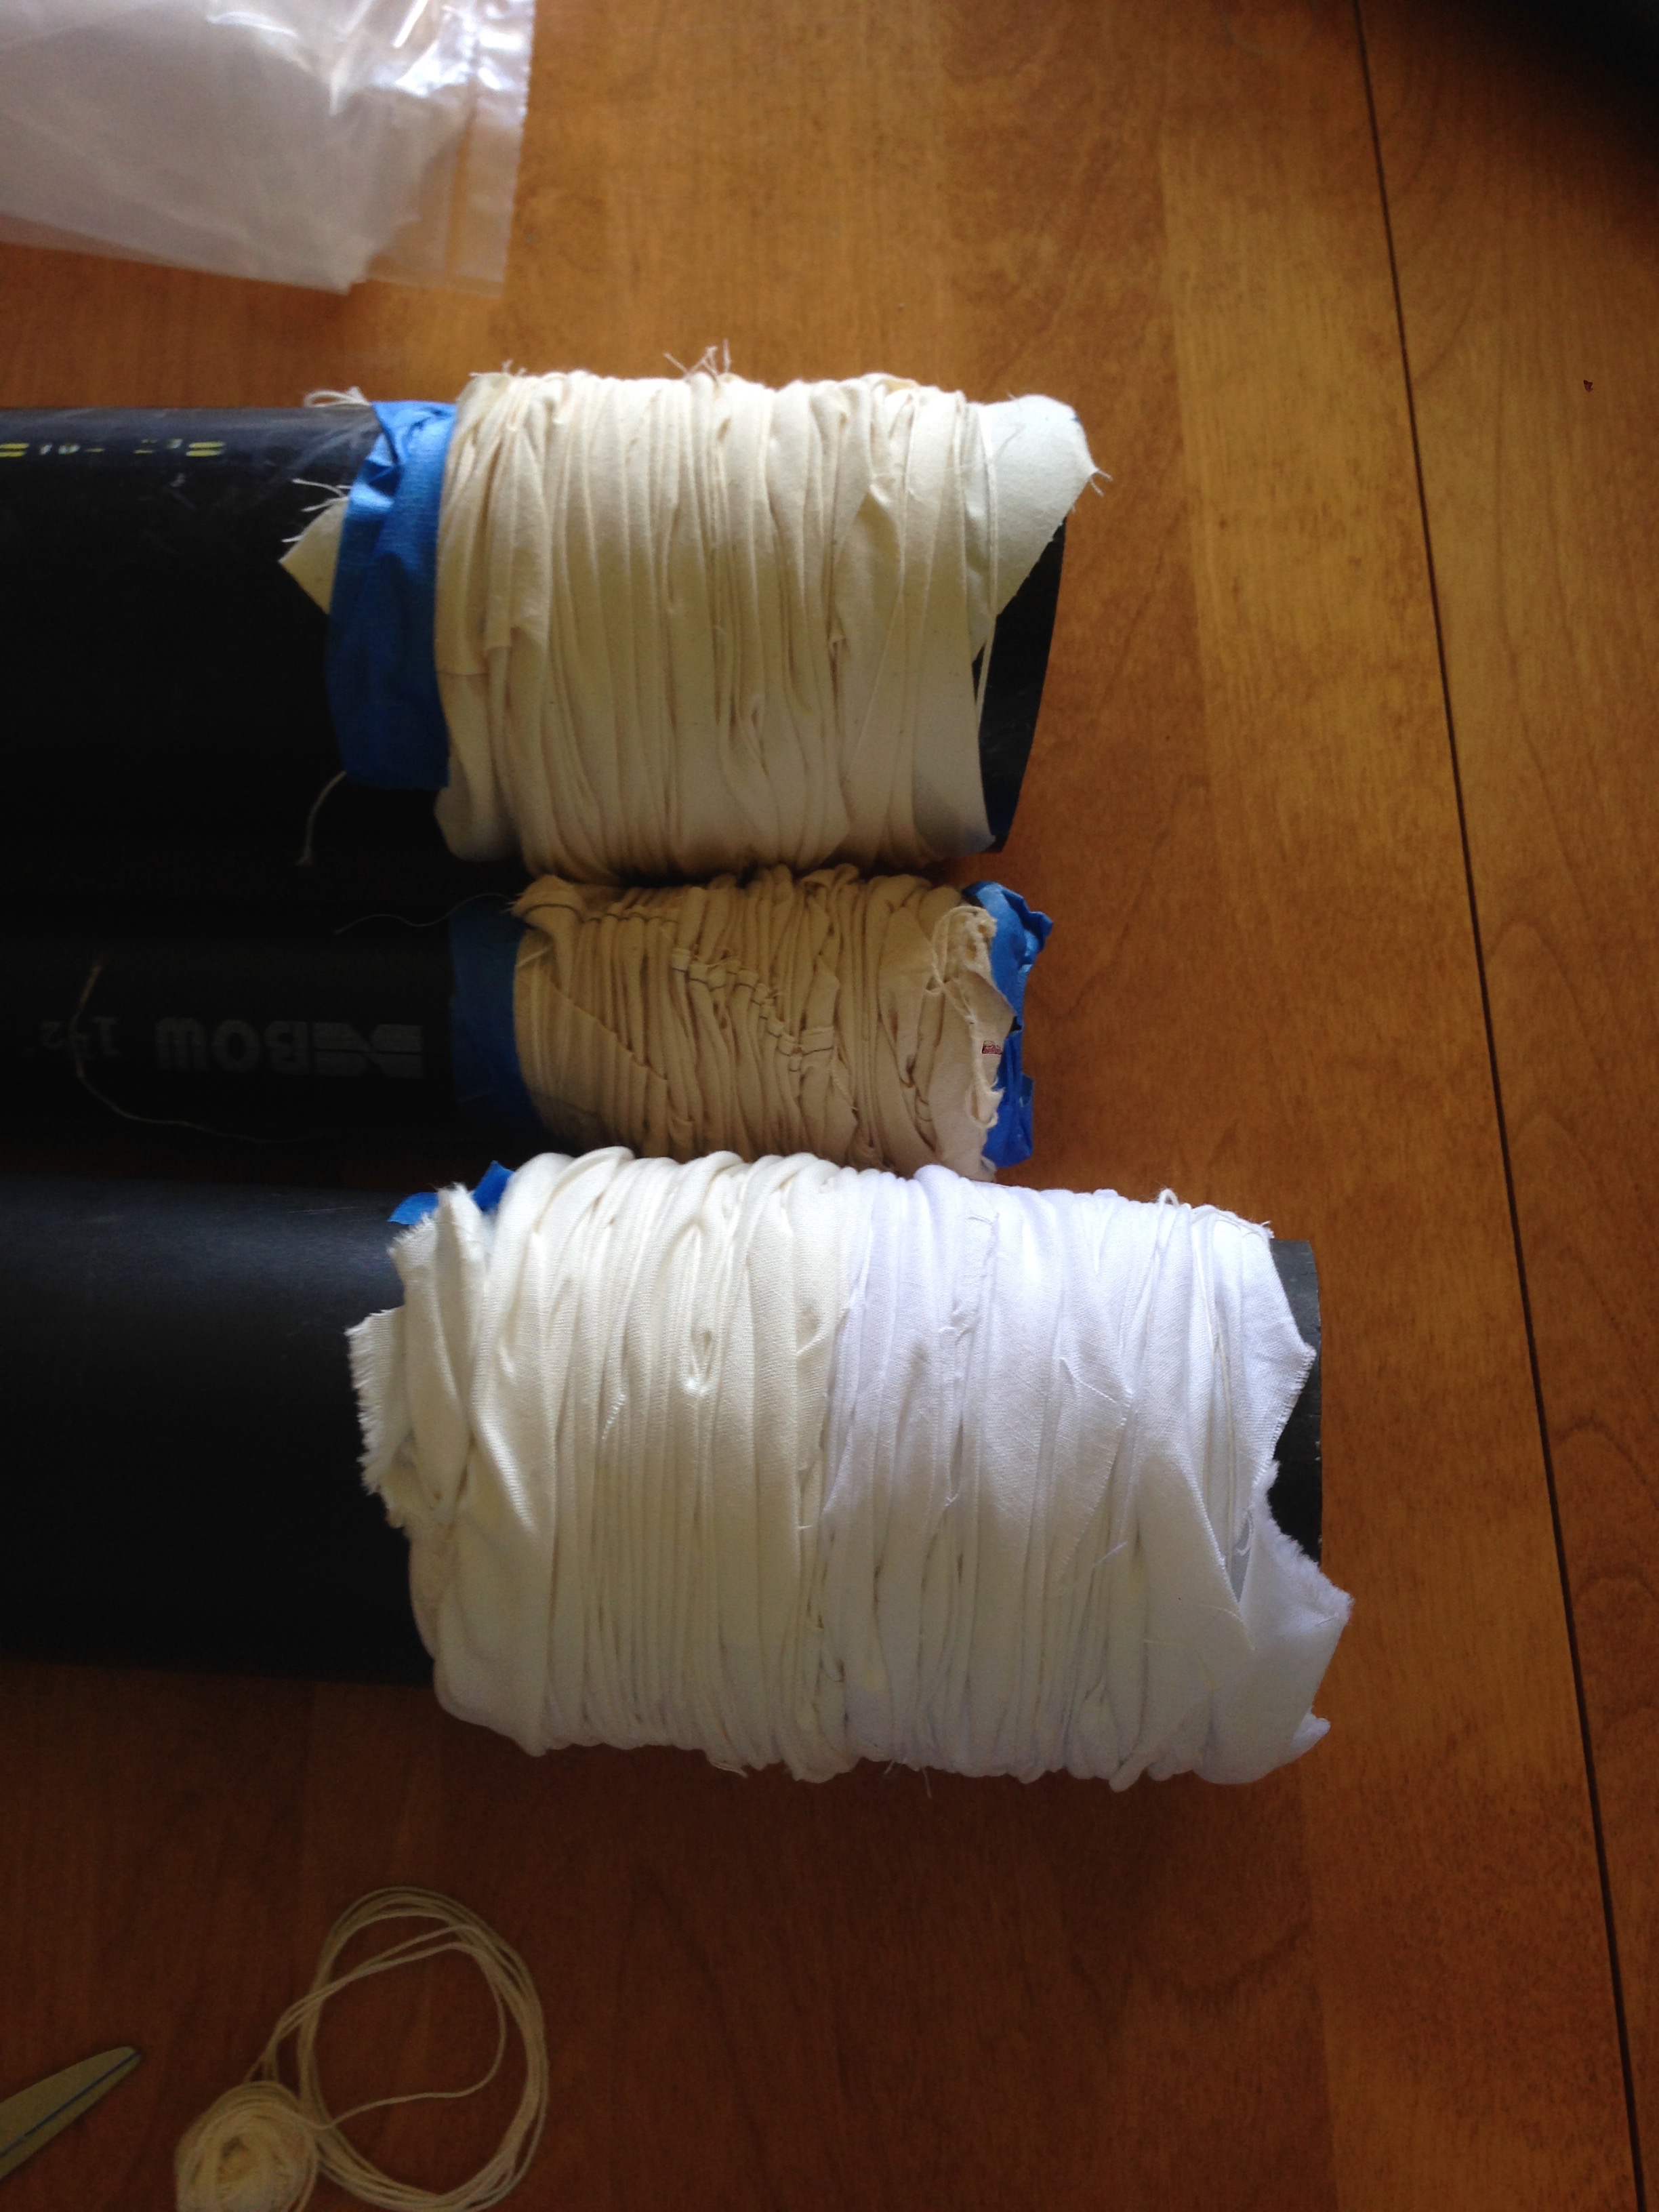 There are lots of different ways to arrange the fabric for dyeing, depending on the result you want. Here, I tried wrapping the fabric around a length of PVC tube (like you’d use for plumbing a drain), and wrapping string around it was I went, then scrunching the whole thing down to one end of the pipe. I used a little tape to keep the ends from slipping.
Then we plunged it into the vat of indigo. You leave it in for 3 minutes, pull it out and marvel that it turned GREEN! and then sit it in the sun for 20 minutes, where it turns blue. Then return it to the vat again for more dye. Apparently, it reacts as much as it is going to, after about 3 minutes in the vat; then you have to remove it and sun it in order to get a fresh reaction. We did 3 dips in the dye – we would have to wait until after the fabrics were finished and put through the washing machine before we could ascertain whether that was enough dips to get the depth of blue we wanted.
But here are the wrapped tubes after 3 dips and a quick rinse:


The instructions tell you to gently massage and manipulate the fabric with one hand while it’s in the dye. We did that, though not very aggressively – frankly, I think we were both afraid that we end up with just solid blue fabric! But after seeing the results, I realize how the massaging is important for working the dye into the folds of the cloth. And if you want a more even pattern, it’s also important to try to keep your folds/scrunches fairly regular.


Here’s R with a piece of fabric she’s folded in triangles, then secured the three edges of the triangle wad with metal skewers held together with elastics. You can see the triangles in the design… they unfolded into hexagons!
 We used all-white fabric for some of the dyeing. But we also tried over-dyeing, using some of the fabrics we’d dyed last summer that didn’t turn out as well. Adding a layer of shibori was definitely a great way to spice up a fabric that had previously been a grungy orange.
For this piece, I folded it accordion-style, then wound elastics around it at intervals. Turned out really cool!
R kept all the samples we’d made so they could be run through her washing machine. Later, she sent me this photo of all the pieces pinned to her design wall – including the cyanotypes. Don’t they look awesome?
You can see that the indigo blue came out a lot lighter after washing and drying. Another time, we will try doing more dunks into the vat, and more massaging of dye into the creases. But we’re pretty happy with how this first batch came out!
It was a fun day, although I did go home with blue hands, despite wearing gloves for the shibori. I’m definitely looking forward to more adventures with R!

It looks like a fun day and the results are beautiful.
LikeLike
Yes, you never know when you’re trying something for the first time – but I’m happy with the results, and we know what we’d do differently next time!
LikeLike
Fascinating! And cool results 🙂
LikeLike
Thanks!
LikeLike