The Kanji Quilt

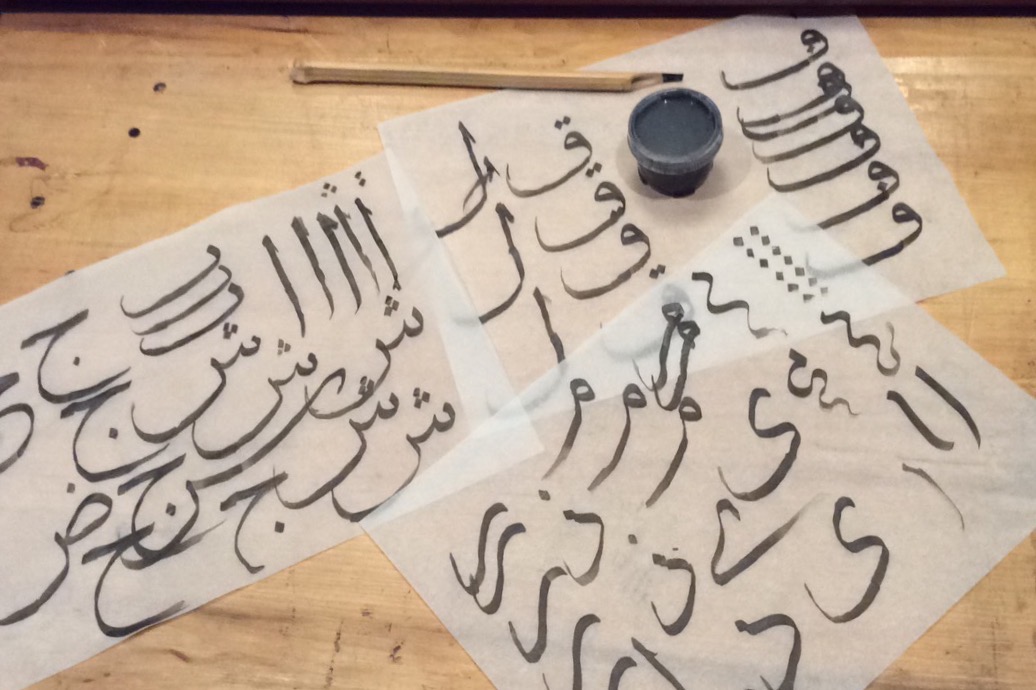
A few years ago, I blogged about my “Kanji quilt”. It was a piece I created as an assignment in a “Calligraphy and Conceptual Art” course I took at my local university. The course was a lot of fun. We were able to try Arabic calligraphy (my attempts at right) and Japanese calligraphy, as well as learning about artists whose work was calligraphy- or text-based.

One assignment was to make our own art pieces, inspired by Japanese calligraphy and its improvisational nature. My first go involved cutting Japanese kanji characters out of autumn leaves and floating them in a pond. But when I ran this by my instructor at a progress meeting, she said it was trite.

With just days before the assignment was due, I was back to the drawing board. (I still like the picture I took, though.)

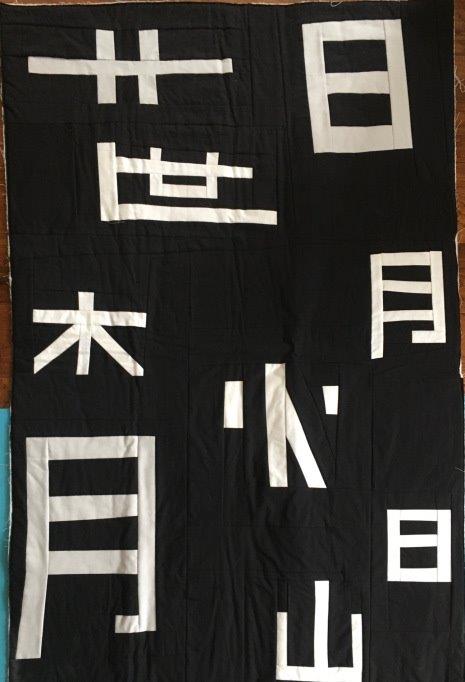
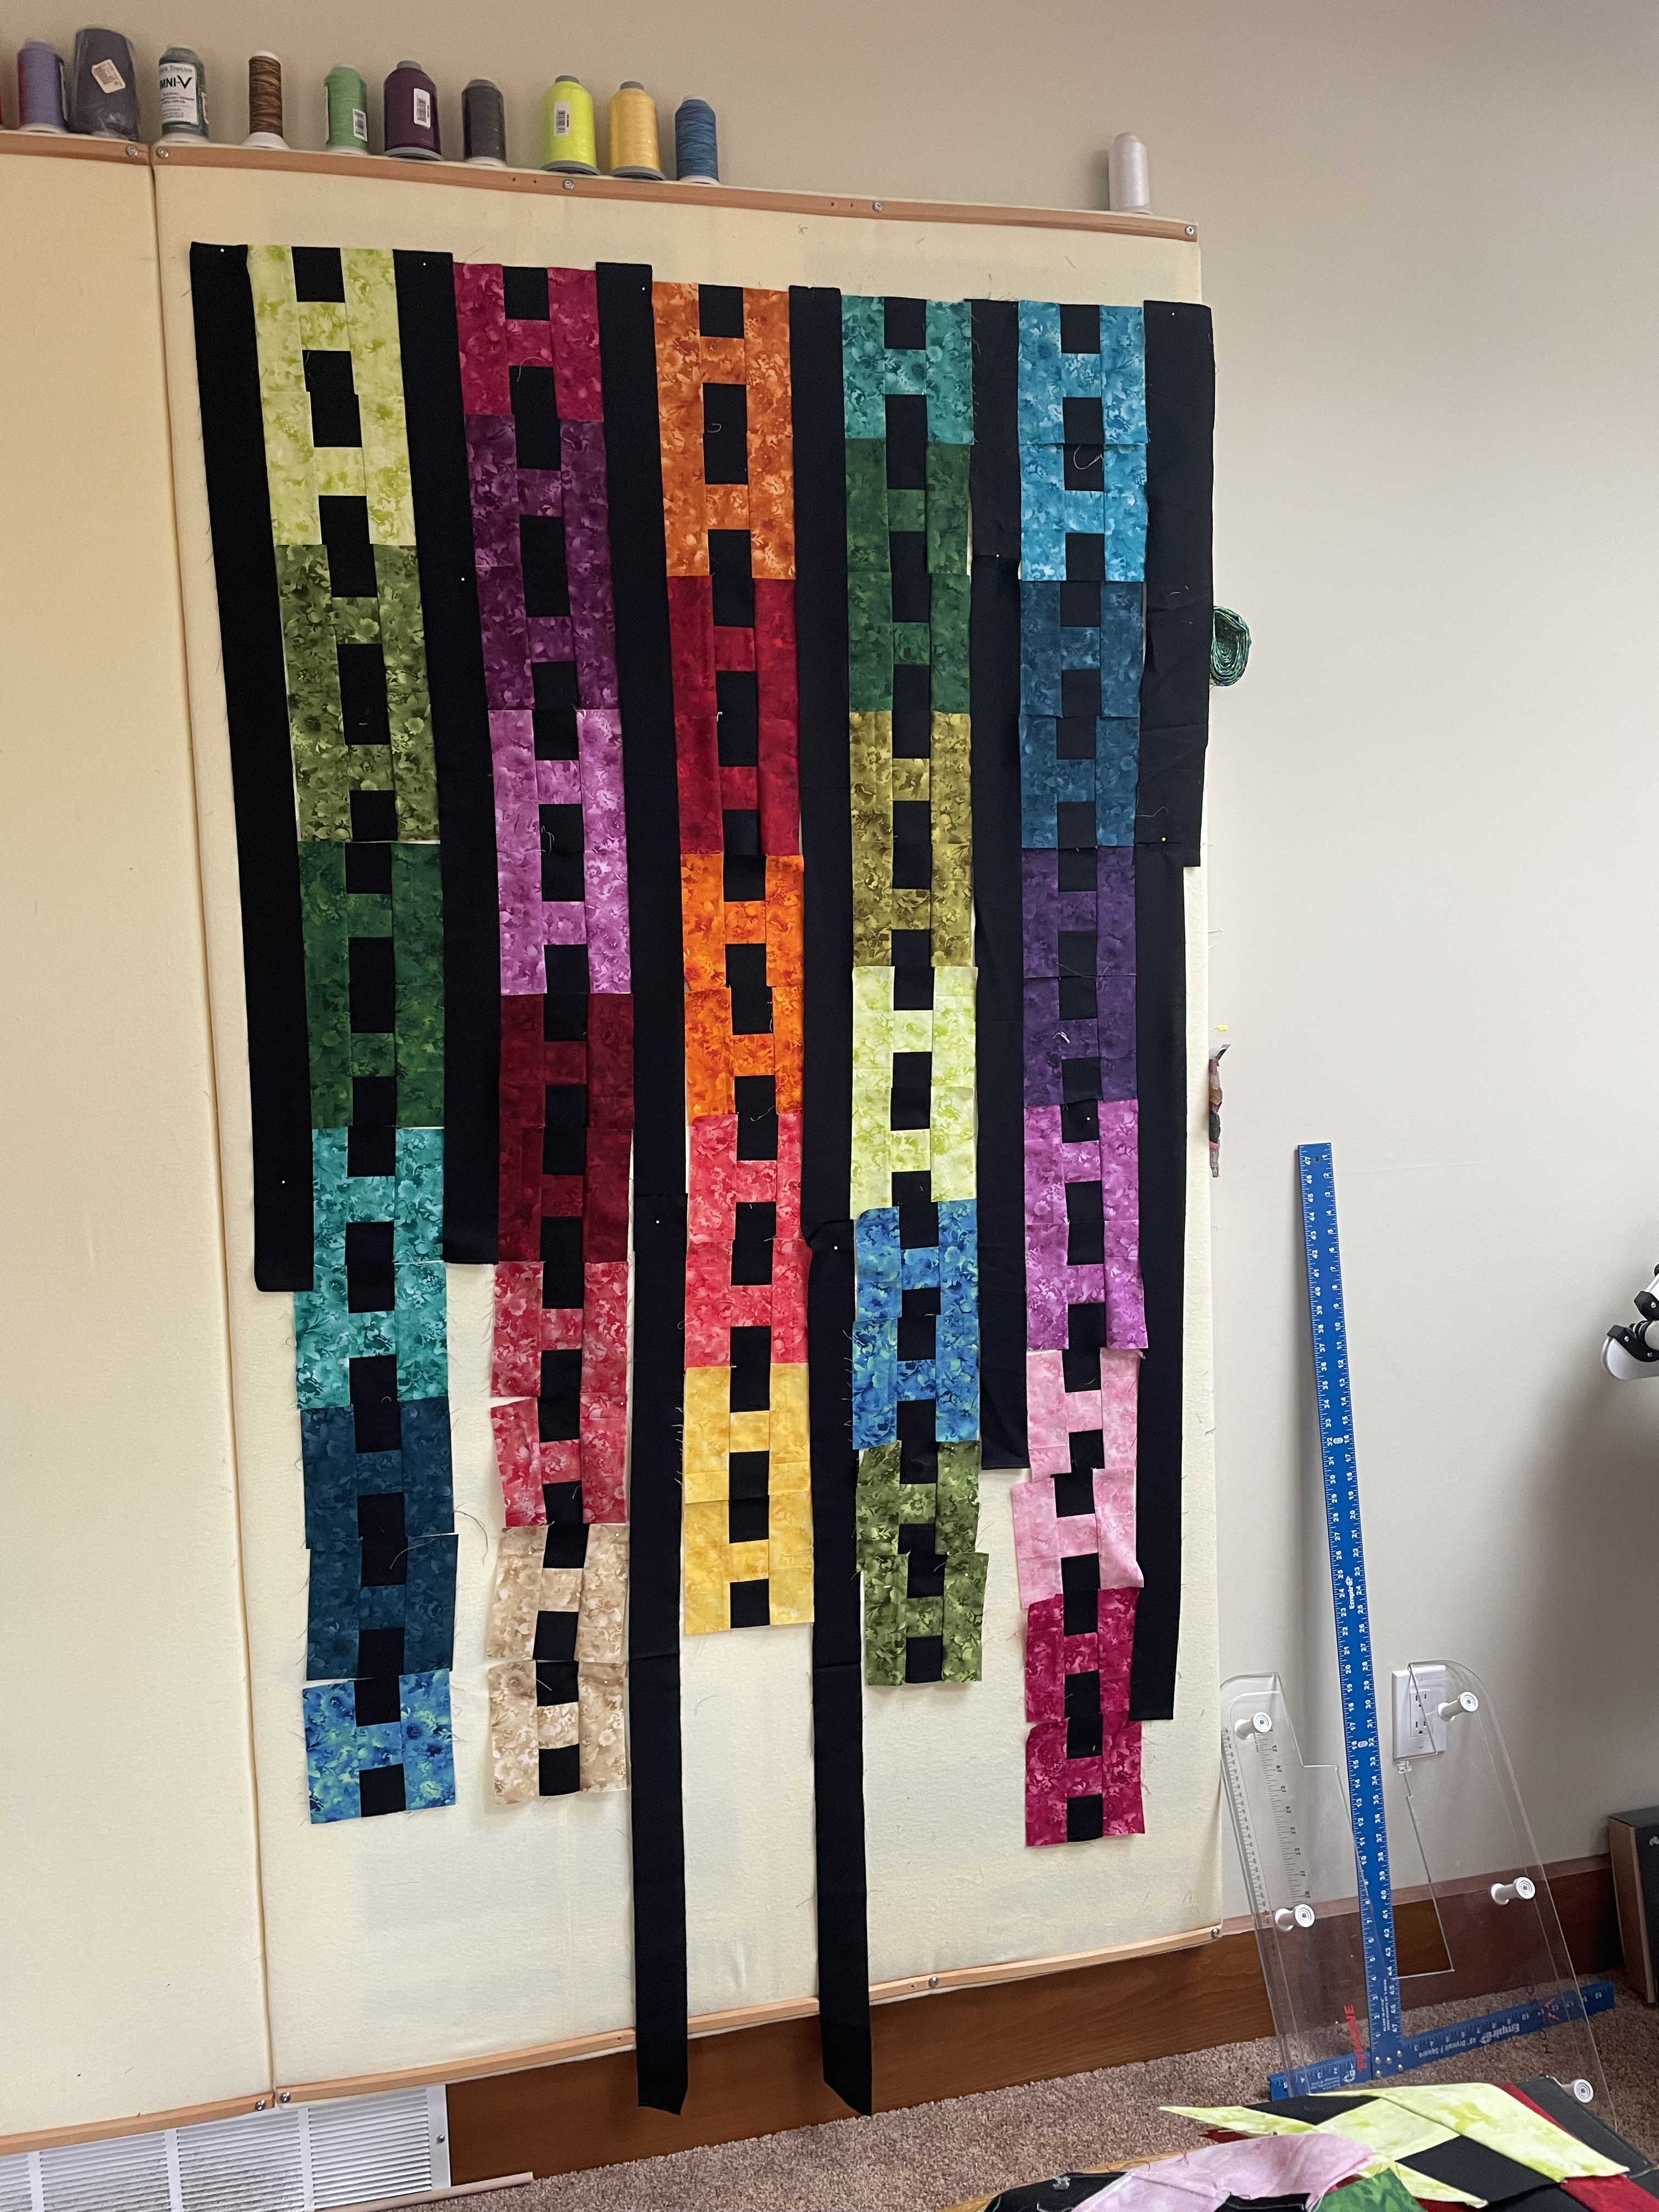
I decided to use improv piecing to create kanji quilt blocks. I had not done a lot of improv piecing prior to this, so I found the process of free-cutting and free-piecing to be a big change from traditional piecing. At right, you can see the quilt top I turned in. The instructor was impressed that I had done the project in fabric, but she felt that the blocks were not improvisational enough: she would have liked to see even more variation in the piecing. Well — she wasn’t wrong. She asked me afterward if I would continue to work on the piece, and we discussed adding more appliqued kanji, or quilting in some kanji shapes. But after the course was over, the quilt top sat for years in my sewing room, while I contemplated how to improve it.

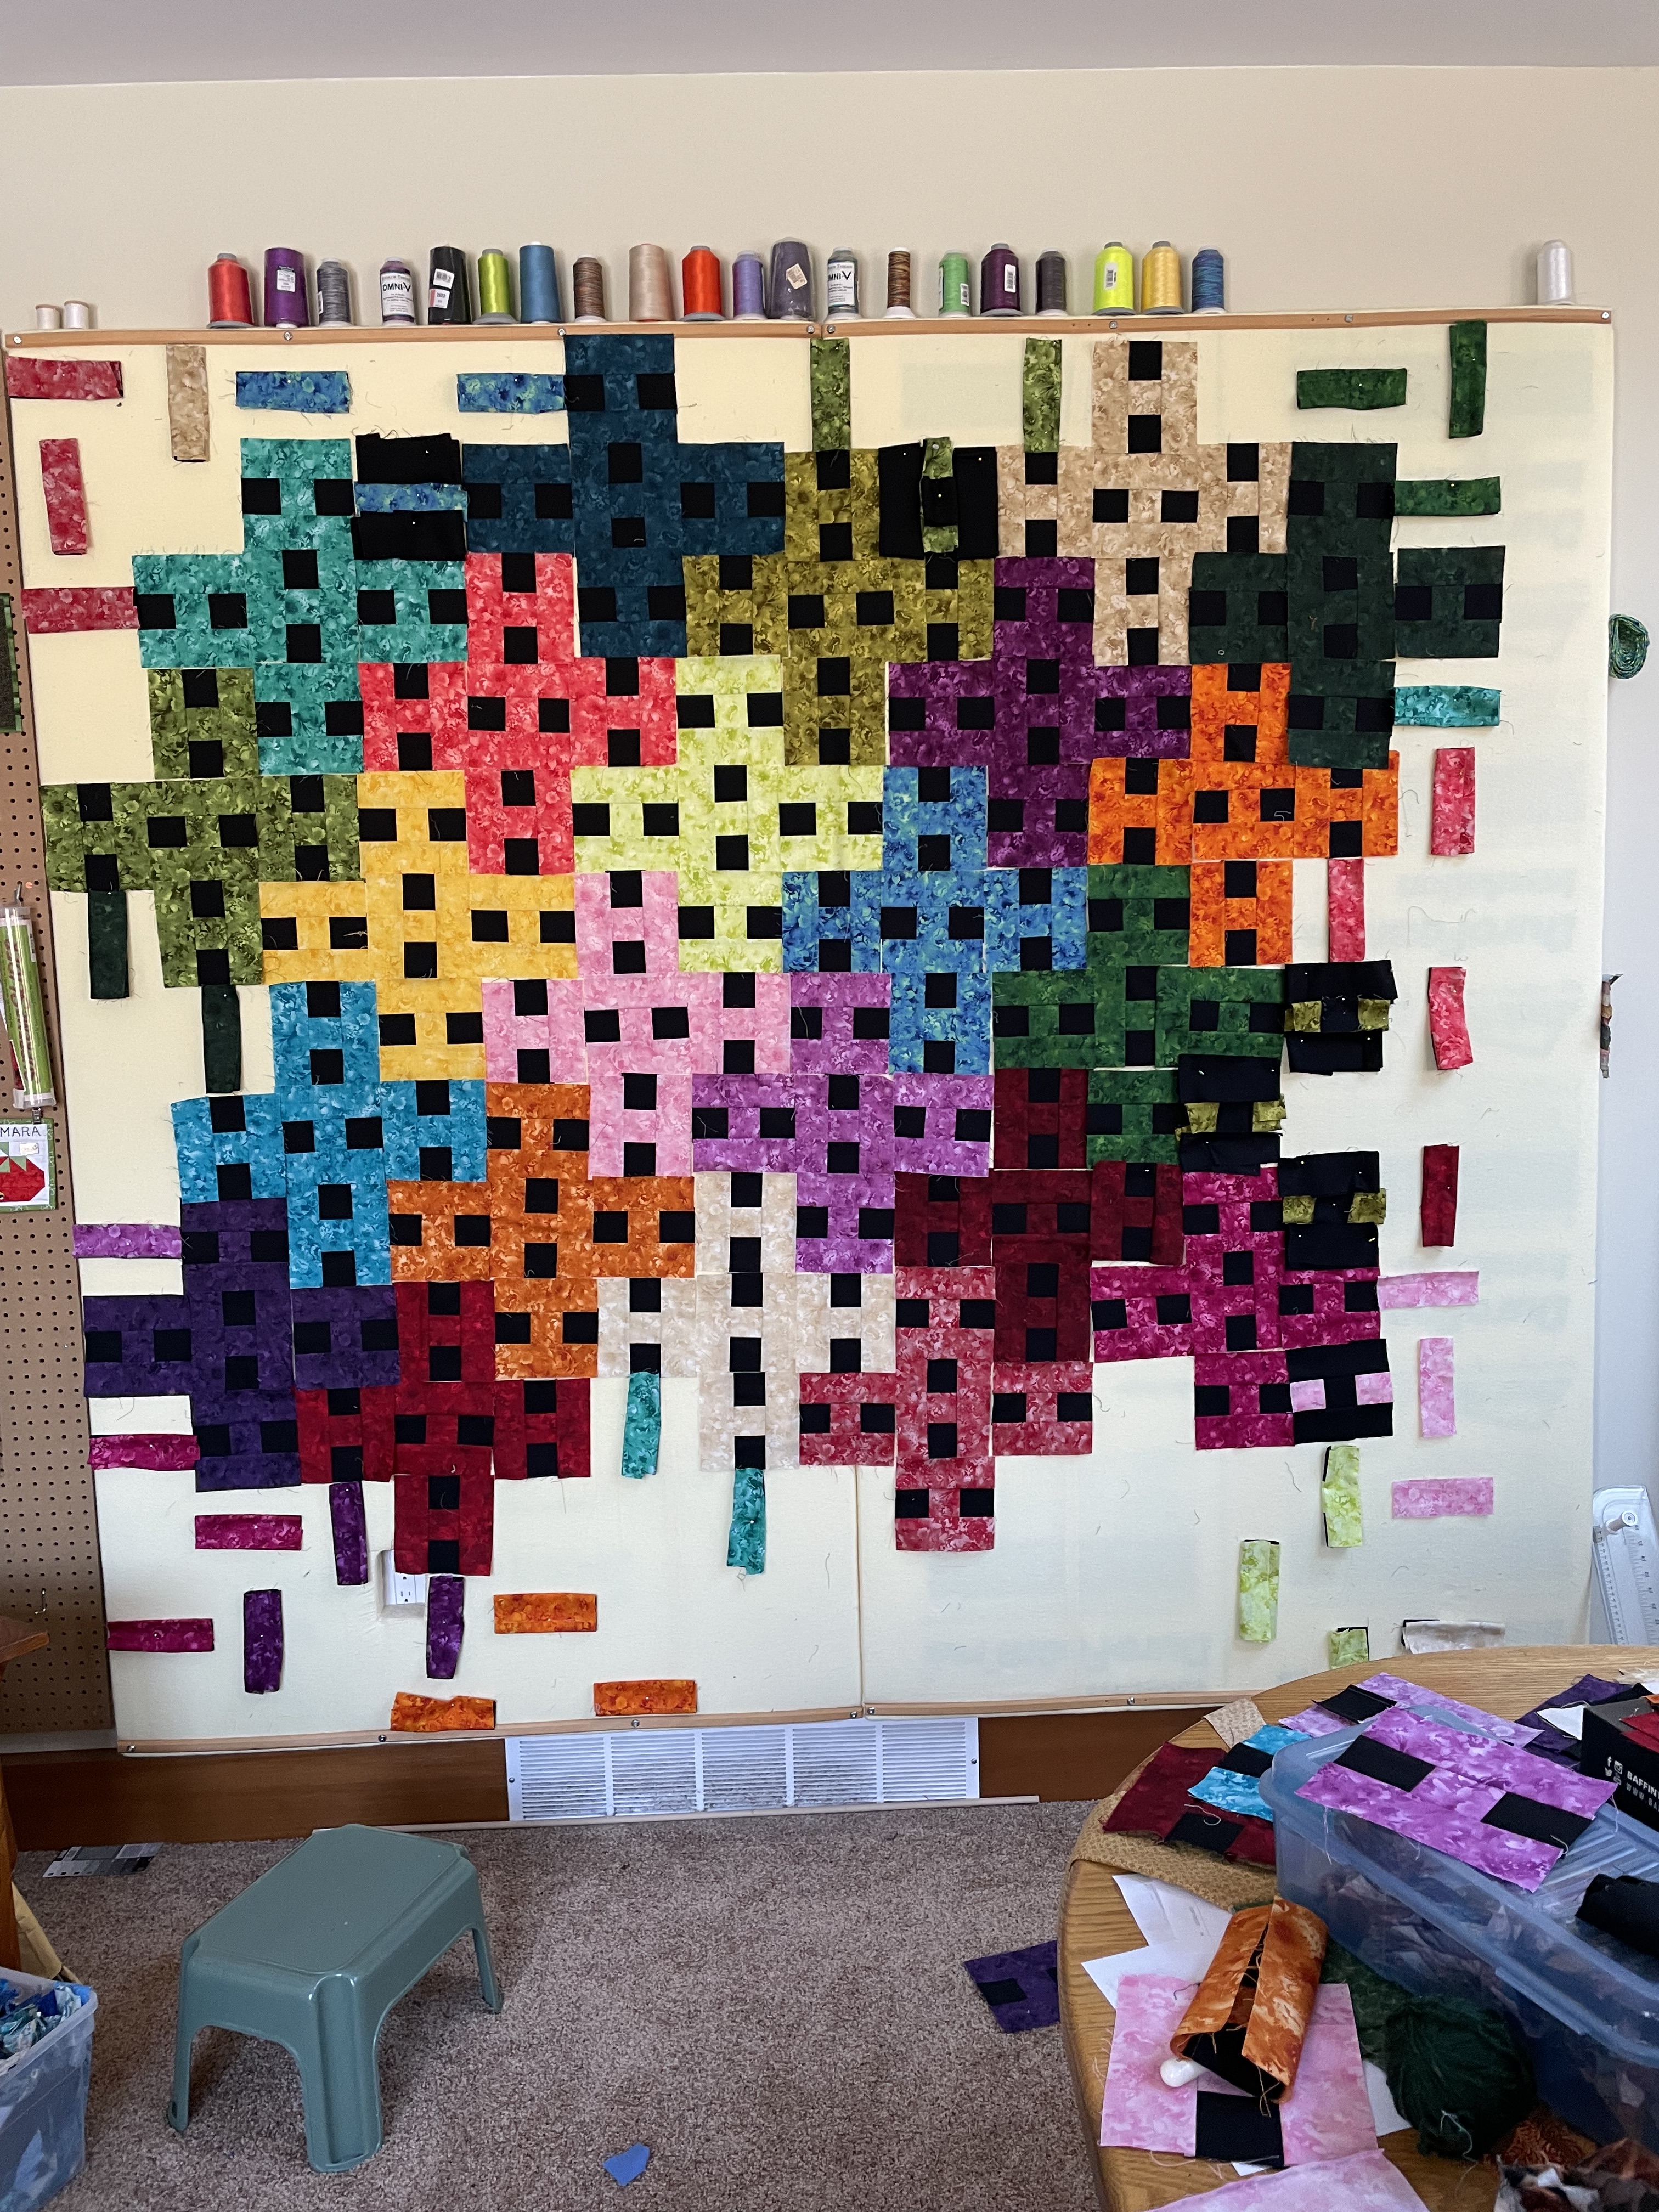
Recently, my friend Celeste (Meerkat Shweshwe) offered an online class in improvisational piecing techniques. I joined, thinking that this might be an opportunity to move my Kanji quilt forward. I chopped the quilt apart, separating the kanji into blocks that would be surrounded by improv piecing. I even pulled out another orphaned block, left from a Jacquie Gering class called “Designing with Line”. Because that block had some lime green fabric in it, I decide to incorporate more lime green into the new version of the quilt, which added some life to the otherwise achromatic colour scheme.

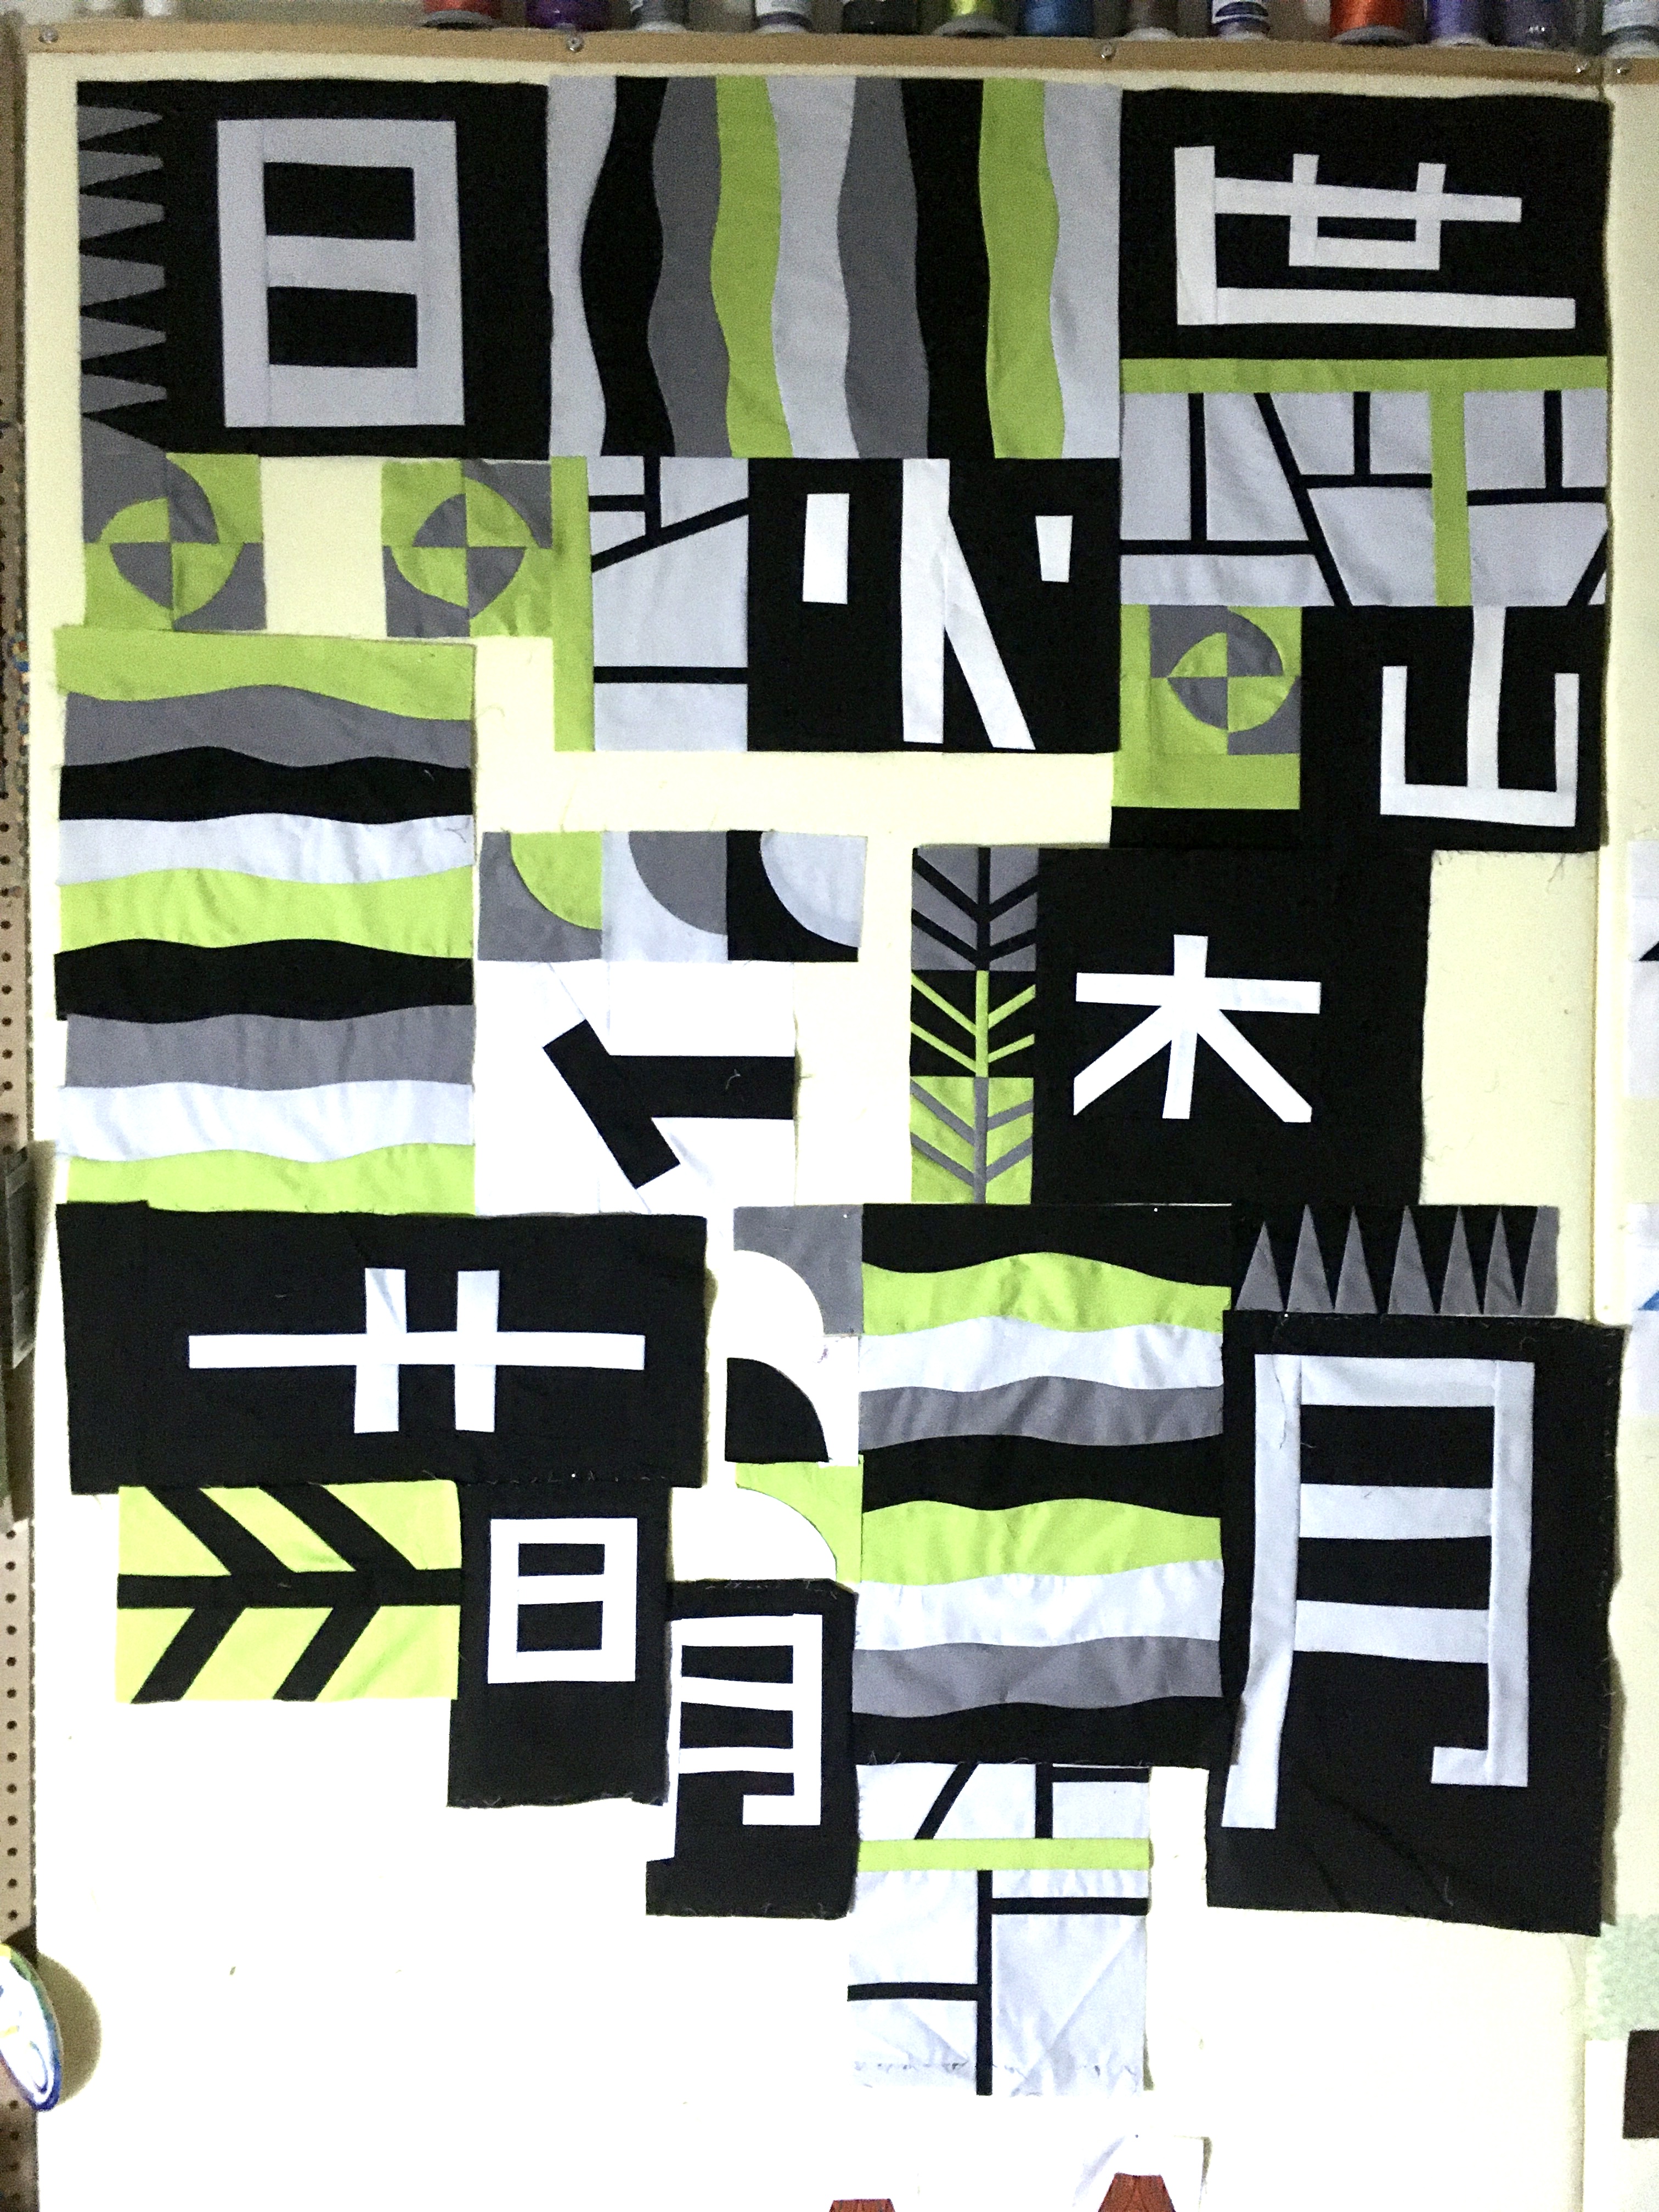
As we explored new ways to piece improvisationally, I gained more elements to play with on my design wall. I continued to cut units apart and make new ones as I explored ways to arrange my growing collection of blocks. Celeste was such a great source of encouragement to play. Just like with writing, you have to fight the urge to settle on an idea too early, and give yourself permission to wander down the creative path and see where it takes you.

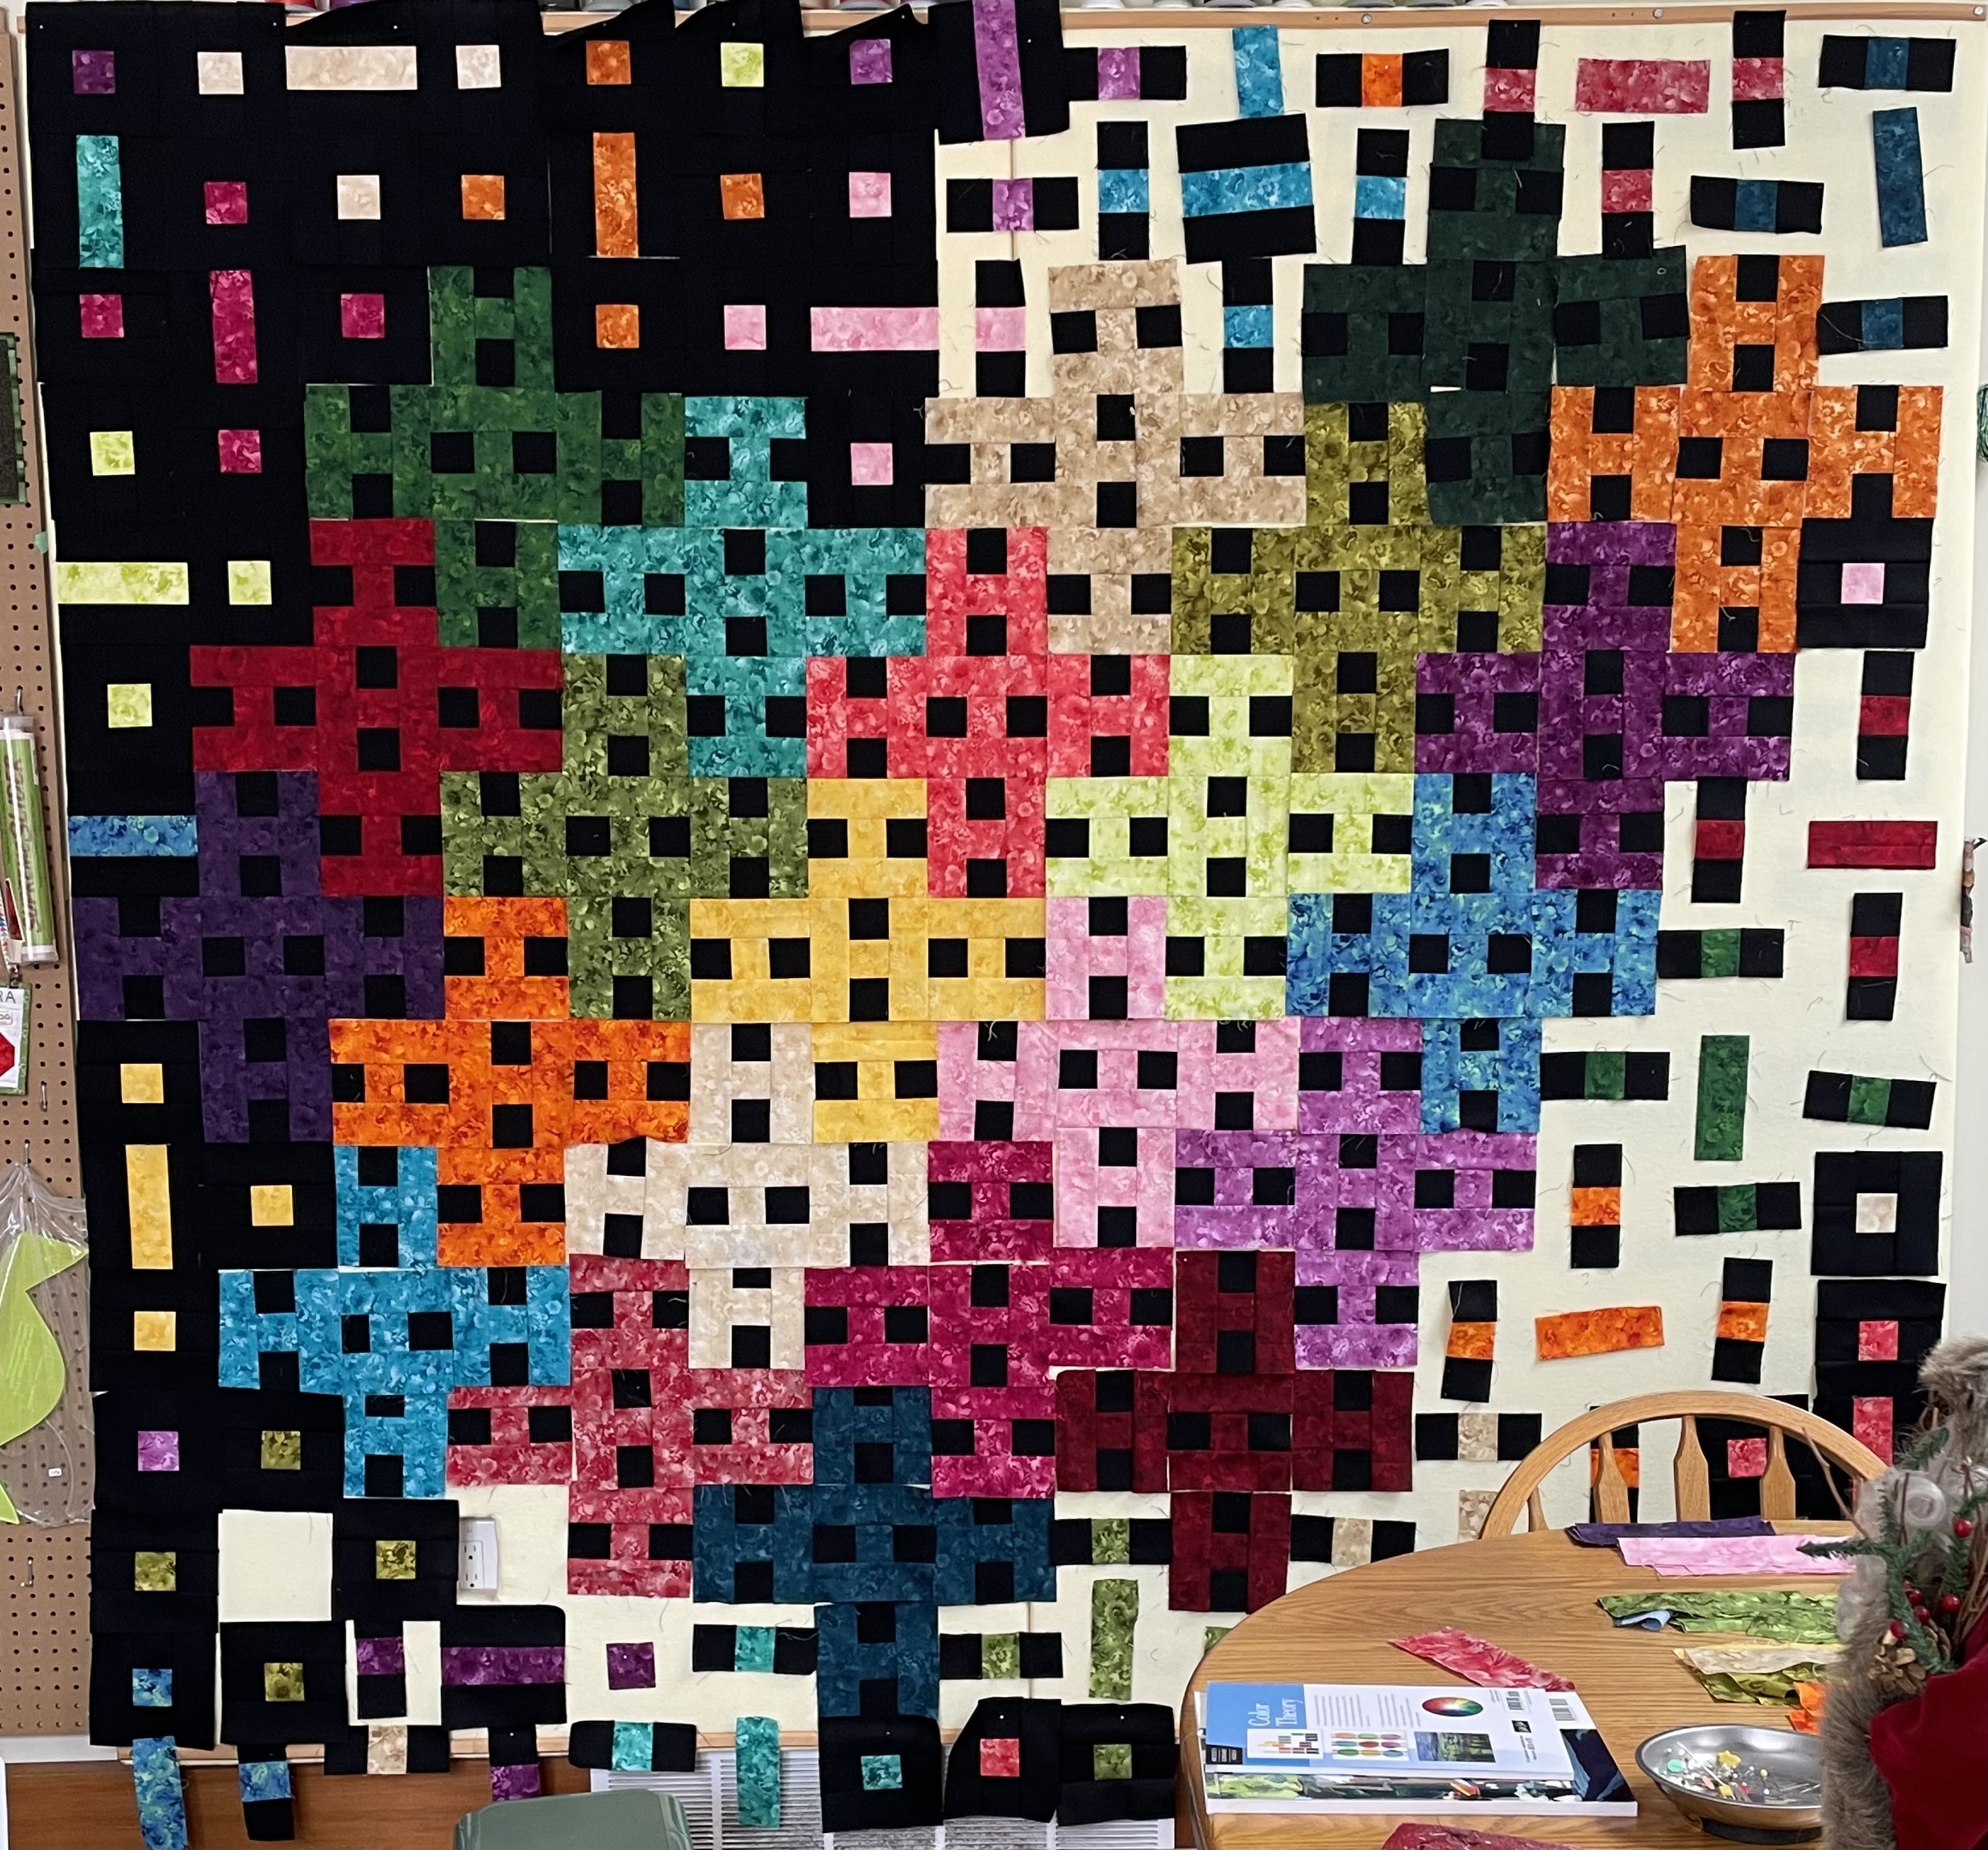
Finally, I arrived at an arrangement that I found pleasing. It repeats shapes in different sizes and orientations; plays with value; and uses colour, line and repetition to move your eye around the quilt. I’m actually quite happy with it.

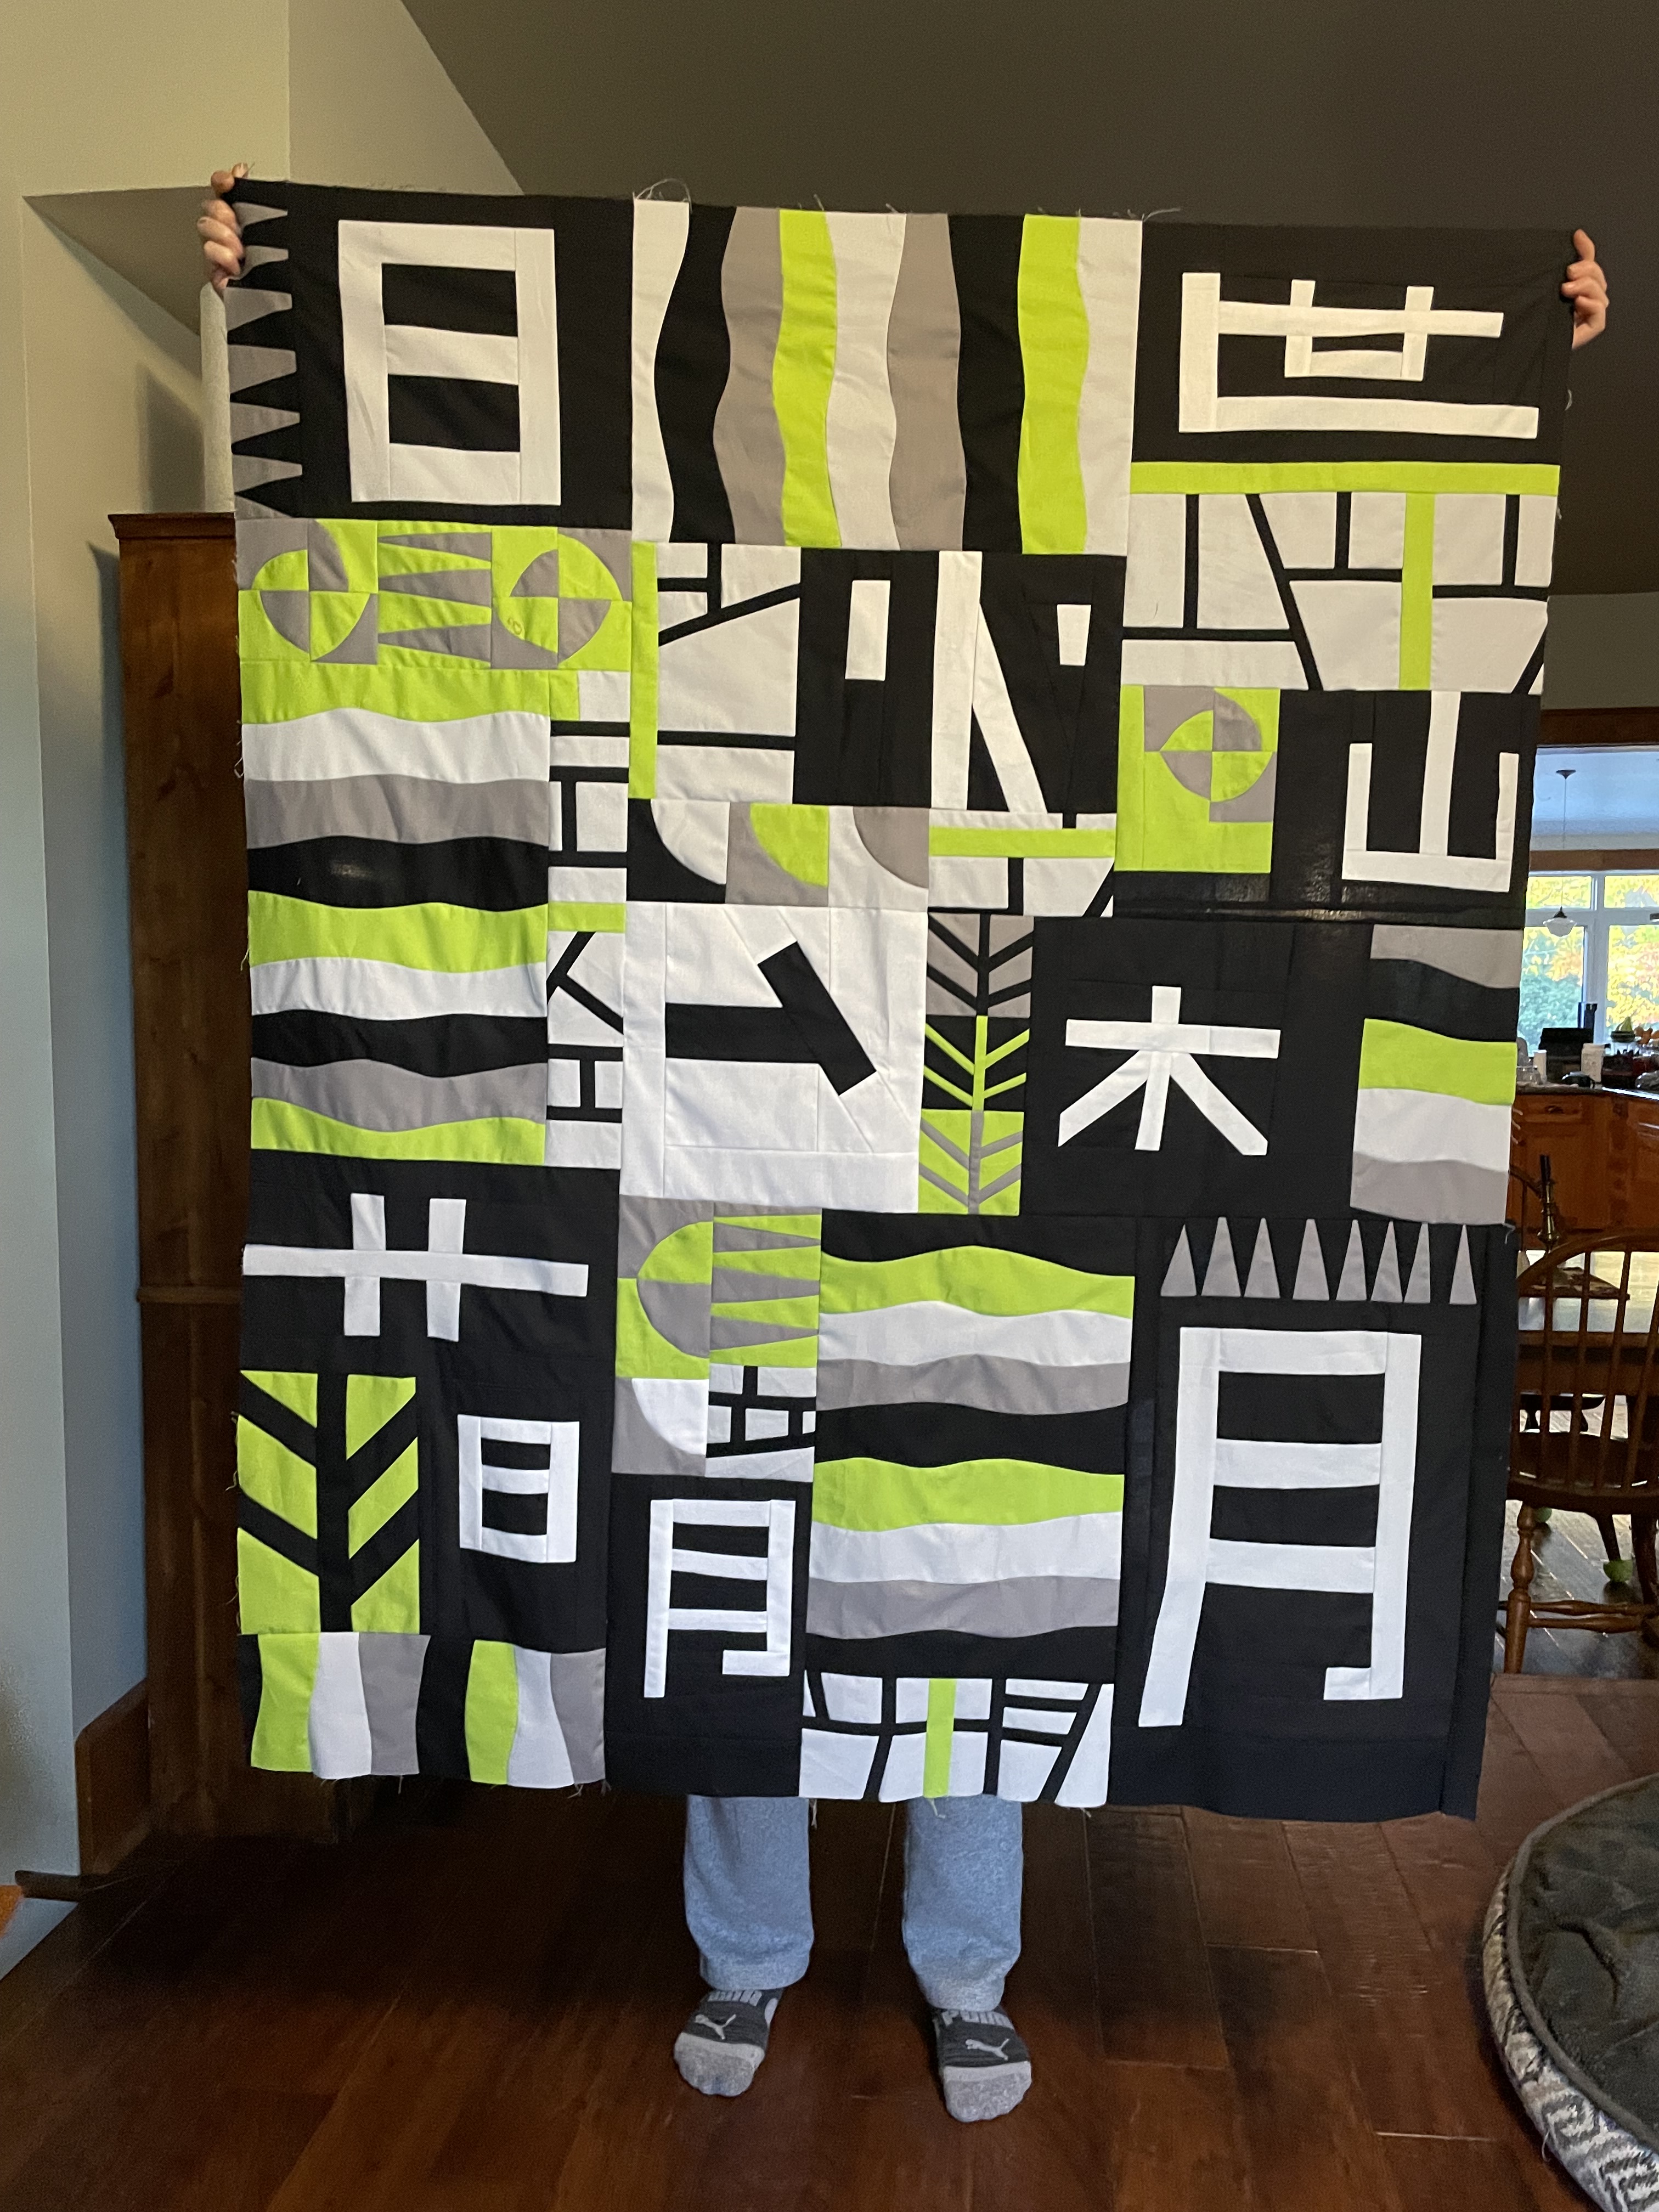
Someone asked me what it “says”. It doesn’t say anything. The idea of the original project was to explore text as shape, without regard for meaning. So while my piece does include kanji for sun, moon, mountain, etc., it also has some shapes that are kanji-like, but aren’t real kanji.

Oh, and in case you’re interested, the Japanese word “kanji” literally means “Chinese characters”, since ancient Japan adopted the Chinese writing system, much as ancient Britain adopted the Roman alphabet.

Next step, I need to get quilting, so I can hang up my Kanji quilt and enjoy it!

Mouse’s H blocks

Years ago, when she was maybe 12, Mouse went to a guild meeting with me and fell in love with a couple of fat-quarter bundles that were being sold by the guest merchant.

Over the years, she has slowly been assembling H blocks from these fabrics, and last fall she finally sewed the last of the blocks. A cause for celebration! But – then she had to decide how to put them together.

Although the two bundles were arranged like rainbows, and looked great all tied up, once made into blocks, they did not “colourwash” very well, much to Mouse’s disappointment. There are not enough different shades to allow good blending, and some of the colours look a bit out of place when you try to blend them. We moved her blocks around and around on the design wall, but couldn’t find an arrangement she liked.

Personally, I was rather partial to this arrangement, which reminded me of film strips.

One thing I like is that it gives you the opportunity to blend just a few blocks at a time, in vertical columns. Each column can be different. You could create a temperature effect. But Mouse didn’t like this arrangement. Much to my disappointment.

Well, it’s her quilt.

Finally, she settled on a tessellating plus sign design. The problem was, though, that she needed 5 blocks for each plus, and she only had 8 blocks in each colour. That wouldn’t yield enough pluses to make a quilt that would fit her bed.

Well, design is all about problem-solving, isn’t it? So, what if we made a plus from 5 blocks, and then took apart the remaining 3 blocks and made reverse blocks (black H’s with a couple squares of the colour)? I was trying out that idea in the picture at right — you can see a few of them. But Mouse said the reverse H’s looked too much like glowing eyes.

However, when I looked at this photo afterward, I thought I could also make some blocks using long strips of the remaining colours, sandwiched with black. So that was the next thing I tried. Then I added some black blocks with one square of colour in the middle. Maybe it might make it look like it was pixelating out at the edge?

Mouse agreed that this would be okay with her. But by the time we arrived at this design idea, she was back at university and too busy with classes to think about sewing. And now she’s at work for the summer.

So it has fallen to me to do the extra piecing needed to finish this top. If I want it off my design wall, that is.

Admittedly, I have lost my enthusiasm for this quilt top. Especially since I feel like I would make different decisions, if it were my own project.

Sometimes you just have to bite the bullet and get the work done, though. I’m sure it will look cool when it’s finished and on her bed.

Fabric dyeing experiment

This fabric is from one of the sun-dyeing experiments that Renske and I did a few summers ago. I don’t remember exactly the technique, but it was a sun-reactive dye. We spread the fabrics out on Renske’s front lawn, placed objects over the muslin to shade the areas that we didn’t want to react, then waited half an hour. It is a neat process.

On this piece, I placed a number of Japanese maple leaves and fern leaves. Then Renske suggested adding some wide metal washers, which I did. I liked how the leaves turned out, but I wasn’t keen on the pale circles left by the washers.

The fabric sat in my sewing room for quite a long time while I contemplated what to do with it. Finally, I had the idea of a rain puddle with autumn leaves floating in it. I quilted a ripple pattern through the piece, then used floss and sashiko thread to hand-stitch more ripples in each circle, to look like individual rain drops. It turned out okay — though, honestly, I thought the hand-stitched lines would be more effective at reducing the contrast of the pale circles. I tried grey and gold, as well as a lilac colour. When the first set of stitches didn’t seem enough, I added more. I still think there’s too much contrast. I didn’t turn out as well as I’d imagined in my head.

I do like the effect of the leaves, and I wouldn’t mind trying this dye method again.